Sync Points
The placement of clips in Grid and Spot mode can be based on the definition of a clip sync point. Sync points can be added to audio and MIDI clips, and also to clip groups. Sync points are used when a specific point within a clip must be aligned to the Grid or to a particular bar/beat location.
For example, suppose you had an audio clip for a door slam that included the creak of the door closing, the actual slam, and the reverb of the slam. Using a sync point for the slam sound in the clip lets you spot it to a specific time in the project.
To define a clip sync point:
2. Do one of the following:

With the Selector tool, click at the point in the clip where you want the sync point.
Press the Down Arrow key while playing back.
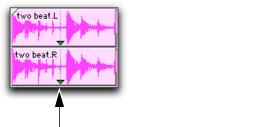
3. Choose Clip > Identify Sync Point. A small down arrow appears at the bottom of the clip, with a vertical, light gray line indicating the location of the sync point.
Sync Point
To change the location of a sync point:
With the Selector tool, click at a point in a clip and choose
Clip > Identify Sync Point. The new location is identified as the sync point for the clip.