Renaming Clips
In the course of a project you can rename clips to give them more descriptive names, or to shorten or simplify existing names. When renaming a clip that was auto-created during editing, the clip becomes a user-defined clip and is displayed in the Clips List even when auto-created clips are hidden.
If a clip resides in a track, you can easily rename it by double-clicking it with one of the Grabber tools. However, if the clip does not reside in a track, or if you want to rename several clips, use the Rename command in the Clips List.
You can also rename a clip in a track using the Rename command in the Clips List menu or the Right-click menu.
To rename one or more clips from the Clips List:
1. Select one or more clips to be renamed in the Clips List.

If the Clips List Selection Follows Edit Selection option in the Editing Preferences page is enabled, you can highlight a clip in the Clips List by selecting it in a track.
2. Do one of the following:

From the Clips List menu, choose
Rename.
Right-click on any selected clip and select
Rename from the pop-up menu.
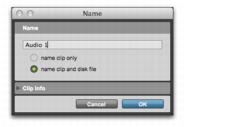
3. In the Name dialog, type a new name for the clip. If a whole-file audio clip was selected, specify whether to rename just the clip, or both the clip and the disk file.
Name dialog
4. Click OK to rename the clip. If renaming multiple clips, you are prompted, successively, to rename each clip.
You can resize the Name dialog by dragging the boundaries of the dialog.