Manually Editing Note Velocities
When a MIDI or Instrument track is set to Velocity view, or when the Velocity lane is revealed under a track, each note’s attack velocity is represented with a velocity stalk. The taller the velocity stalk, the higher the velocity value (0–127).
To edit MIDI velocity in the Edit window:
1. Do one of the following:

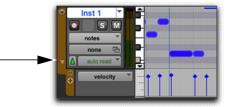
Set the MIDI or Instrument track to Velocity view.
Reveal the Controller lane for the MIDI or Instrument track and show Velocity.
Revealing the Velocity Lane
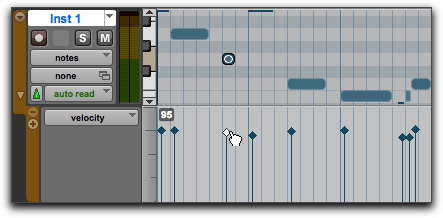
2. Select the Grabber tool.
3. Drag the top (diamond) of the velocity stalk up or down.
Dragging a velocity stalk
The velocities for a range of notes can be edited with any Pencil tool.
To draw velocity values for a crescendo:
1. Do one of the following:
Set the MIDI or Instrument track to Velocity view.
Reveal the Controller lane for the MIDI or Instrument track and show Velocity.
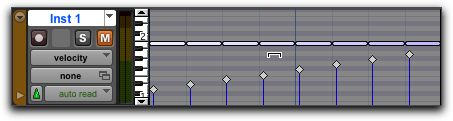
2. Select the Pencil tool with the shape set to Line.
3. Click at the beginning of the note range, near the bottom of the velocity range, and drag to the right and up until the line encompasses the range of notes you want to include in the fade.
Changing velocities with the Line shape
You can also use the Trim tool to scale the velocities for all selected notes. This is useful if you like the velocity relationship between the notes, but want them all to be louder or softer.

When in Velocity view, the Trim tool can be used to trim note durations in addition to changing velocities.
To scale velocities with the Trim tool:
1. Set the MIDI or Instrument track to Velocity view.
2. Using the Selector tool or any Grabber tool, select the range of notes to be edited.
3. With the Trim tool, click near the range of selected notes and drag up or down. Dragging up increases the velocities for each note and dragging down decreases them.
Changing velocities with the Trim tool